Sunday, November 18, 2007

Chocolate Butter Cake with Rolled Fondant (and Happy Birthday Long!)


My project for this weekend was to create a cake with sugar flowers and rolled fondant, all from scratch.

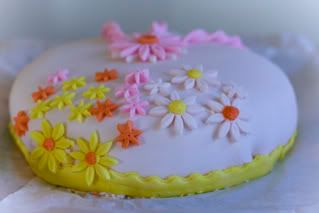
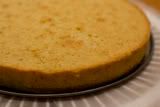
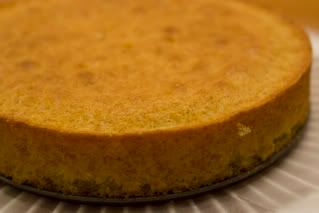
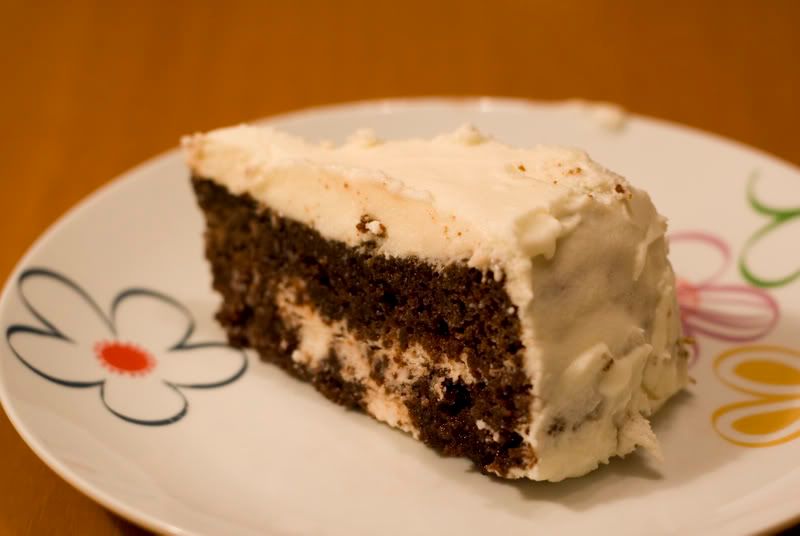
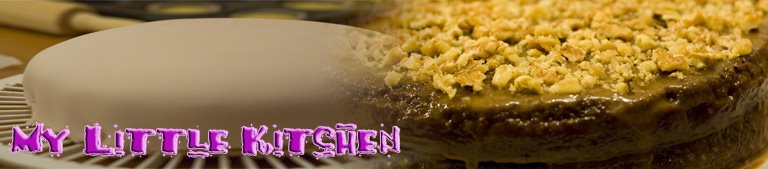
I have a base recipe for chocolate cake that I got again from Sarah Phillips (the Ultimate Chocolate Cake recipe). For the frosting, I made the White Chocolate Ganache. Preparing those are kind of routine for me already so it was easier. The challenge was creating the fondant to cover the cake, and to be made as flowers. I followed a recipe for rolled fondant that uses gelatin envelope on the recipe. I prepared this the night before because rolled fondants are best to use after letting it rest for 24hours. So I cooked the gelatin and kneaded it together with the powdered sugar, corn syrup and vanilla. When it got to a clay dough-like consistency, I wrapped it airtight and then placed it in a ziplock then refrigerated it. When I was going to use it already the next day, it was rock hard so I had to thaw it to a kneading consistency. However, it never got to the original clay dough texture. It was more of gummy which cannot be thinned. I was so disappointed, well who wouldn't be after some 7 cups of powdered sugar gone to waste. I was frustrated because I had to throw all of the rolled fondant that I created the night before. I then switched to another recipe which does not use any gelatin. Just butter, corn syrup and powdered sugar. With my trustee hand mixer, I started to cream together the butter and corn syrup, and then I sifted the powdered sugar on that creamed mixture one cup at a time. My new fondant had the clay dough like consistency already after 6 cups. And there it was! I had a very good rolled fondant, very pliable and was rolled to around 1/4 in thick for covering. I rolled it to the diameter that should cover all my cake, placed it over my cake and smoothened it. It turned out very good, no creases and folds in the bottom. After covering the cake, I started decorating the it with sugar flowers that I made the other night. I had created 3 daffodils as center pieces, then I had different sizes of apple blossoms in sky blue, mauve and pink. I created a lot of flowers that it covered the entire cake and still have some leftovers. Here's my final fondant cake, all edible. It was heart breaking to cut it but cakes are supposed to be eaten, right? :)

Wednesday, November 14, 2007

Cupcakes


After having finished all of our desserts, we were left without dessert last night so I decided to bake some cupcakes. I baked a few "practice" pieces and decorated them so that they would be enticing in the eye. :) The cupcakes were made with a Yellow Butter Cake recipe, and the frosting was made with Tami's Ultimate Buttercream Recipe (from Baking 911). Probably next time I should use another recipe for the cupcakes because while baking, it rose over the paper linings and failed to create a nice dome shape. But nevertheless, the cupcakes were still very tasty. I colored the buttercream with nice pastel colors and sugar ragees on top. I'd better get good icing tips and decorating bags next time for better tops! :)
Anyway, there's our dessert. I am selling cakes and cupcakes if you want to get some! :)


Saturday, November 10, 2007

Chocolate Caramel Cake


I made a Chocolate Caramel Cake over the weekend and it was very good. The texture was by far the best, and the caramel was just sweet enough and not overwhelming. I put some chopped walnuts on top, on voila!

My First Marshmallow Fondant


For this week, I wanted make a White Velvet Cake with Neoclassic Buttercream covered with Marshmallow Fondant. I am a little comfortable already with baking cakes and creating frostings and buttercream but this is the first time I am trying out a fondant. I have big baking dreams, but had always been scared of creating my own fondant, in fear of wasting ingredients (especially powdered sugar).
First step is I baked the White Velvet Cake. I made 2 9 by 1 inch cakes baked in two batches which I will make into 2 layers. The recipe that I got from Sarah Phillips turned out to be very good! Next is I created my Neoclassic French Buttercream. I also made some strawberry glaze for filling. After cooling the cakes, I started icing it and glazing it with the strawberry glaze and I left it overnight to crust.
I also started concocting my Marshmallow fondant. I started with melting the marshmallows in microwave for 10secs high. I am supposed to use mini white ones (according to the recipe) but all I could get from Tivtaam are large white and pink ones. Better than nothing though! After melting, I added the corn syrup and the vanilla extract and then I sifted the powdered sugar on it 1 cup at a time. My fondant started taking shape when I was at my 6th cup. Then I started kneading first with my dough hook attachment then with my hand afterwards. My fondant turned out to be slightly pink. I left it to rest in an airtight ziplock. The next day, I started rolling my fondant to get around 16-inch cover for my cake. I am supposed to roll out at around 1/8 to ¼ thick but I cannot go that thin because my fondant started to break. It was very smooth though. After rolling, I placed the fondant of top of my cake, and then trimmed the bottom part. Being the beginner that I am, some sides have short skirts so the cake inside is exposed. I have to line it and decorate to hide the exposed part. After placing the fondant, my cake was round, and the edges on top were not visible. It should not be that way, but I cannot remedy it. I will just charge it to experience. :) Anyway, afterwards I started decorating with linings, flowers and stars which I found difficult to make because my fondant started to get crumbly and brittle. It was very dry and hard to knead. Even if I wanted to create nice flowers, I gave up because the fondant was very dry. So here’s my final cake. It doesn’t look very nice, but it’s delicious!

Friday, November 9, 2007

The Ultimate Butter Cake by Sarah Phillips

I tried baking the UBC again over the weekend and I tried to experiment this time with the flours available to me here in Israel. I made the first cake using the all-purpose flour here and the second cake with self-raising cake flour (this is the only cake flour that I can find here). I tried to replicate everything so that the only difference is the flour. I baked both cakes at 40mins. The first cake rose to a little over an inch. The second cake rose to around over 2 inches.

First Cake (All-Purpose Flour)


Second Cake (Cake Flour)


The only difference that I saw (aside from the height) was the color. The 1st cake was yellowish, and the 2nd cake was a shade darker, close to gold. Otherwise, the texture was the same and both tasted good. Here's the final cake (the 1st cake on top of the 2nd) with White Chocolate Strawberry Ganache and Strawberry Glaze Filling. For the ganache, I have missed a few chocolate bits in fear of overmixing. I'll make sure to melt everything next time.

My Red Velvet Cake


From the start of the week, I have been obsessing on baking this cake because I wanted to learn. (My mini-long term goal is to be able to create a tiered wedding cake!)Anyway, I started working on cupcakes and cookies, and when I think I got it, I dared myself to start baking cakes. So there, for this week, I wanted to create this cake. So I started going over the ingredients. Buttermilk! How on earth will I again find buttermilk in an Israeli grocery. (I can't even get a non-self raising Cake Flour!). I started looking for substitutes for buttermilk and saw here from Sarah's notes that it can be substituted with 2/3cup Yogurt and 1/3 Milk. And I got myself both from my office! Hehe, we have unlimited supply of dairy stuff here in our office (all Kosher though). I also started looking on what frosting to put because Cream Cheese here is quite expensive. I decided that I will go for the Mousseline Buttercream. I have no idea whether it's a no-no to use the red velvet layer together with this buttercream but it sounds delicious so there!Thursday night, I went to the grocery here to get some more butter and flour. Weekends here in Israel are Fridays and Saturdays, so I will be baking my cake on Friday. I decided that I will have a great dinner at home with my bf so I also got myself some wine at the grocery. I know too much info! Anyway, on with the baking story. I started at around 4pm when the sun starts setting so that it wont be too hot for the AC (I live by the sea). I started sifting the flour, baking powder, baking soda, cocoa powder and salt together. After sifting them all together and then ingredients were one on top of the other so I started mixing it, and then it started to get lumpy. I had to sift everything again! I also started mixing my Yogurt and milk with the Vanilla and the food coloring. It did not turn out red, but a little on the pink side even if I finished my red food coloring. I religiously followed the recipe and mixed according to the times indicated and I ended up with a slightly wet batter which I poured at my 9’ spring form pan which was generously greased. Once all poured, it was a little over the half of my pan, and I thought it would just be ok because my UBC experiment last week did not rise that much. But oh my! I was watching my cake being baked and it rose to more than the pan! And it did not bake by 30min mark (because it was too much in the pan). It baked at the 50min mark. I took it out to the wire rack at the first time I had passed the toothpick test. I tasted the crumbs that overflowed from the pan and it was very good and moist! J While cooling my cake, I started making my icing. I know what I was attempting was a really hard recipe for a beginner, but then again…no guts no glory! J I finished mixing the icing which turned out really good but was not stiff enough. It was good enough though to ice my cake.After cooling my cake for a good 40mins, I inverted the cake and cut it in half horizontally to be able to put icing in the middle. When I was putting the bottom part, I broke it in half! I was so disappointed with my clumsiness, and I have almost started to cry. But then again, my bf started fixing the bottom part together with me, like putting pieces of puzzles together. After putting together the bottom of the cake, I frosted it and you guessed it right, frost might have seeped through the bottom. Afterwards, I put back the top part. When it seemed whole again, I started putting crumb coat and after the first coat, it looked like a normal coat that never got broken! After 10mins in the fridge, I applied the final frosting. I still cannot smoothen my frosting properly, but it was better than my first attempt. So there’s my cake! It looks delicious!After our dinner (I cooked beef steak, potatoes and rice), we took out the cake that I meticulously created but got busted because of my clumsiness. I would say it still was a success! It was very moist, and very good, even if it was broken on the inside.Here’s a photo of how it looked like after. It definitely is not red, but it sure was a hit!

Baked Mussels (Baked Tahong)


When I was a kid, my mom used to serve baked tahong (mussels) and I always found it to be a treat when she cooks it. We normally have it when there are special occasions and I figured that it should be hard to prepare. But it's not! I got her recipe for baked tahong and I get to cook it every time I want it. :)


Baked Tahong (Baked Mussels)


1/2 kg Tahong or Mussels
1/2 cup Velveeta or Sharp Cheddar Cheese, grated
1/2 cup Butter
3 tablespoons mayonaisse
6 cloves of garlic, minced

Mussels:
If not using cooked mussels, boil mussels in water until it starts opening. Clean mussels and lay out in baking pan.

Toppings:
Saute garlic and set aside as topping.
Mix cheese, butter and mayonaisse then spoon mixture on top of each layed out mussel. Fill the shell of the mussel with the mixture. Put garlic as garnishing on top.
Bake on a preheated oven at 220C for 8-10 minutes or until top becomes golden brown.

Serve immediately. Enjoy!


or