skip to main |
skip to sidebar
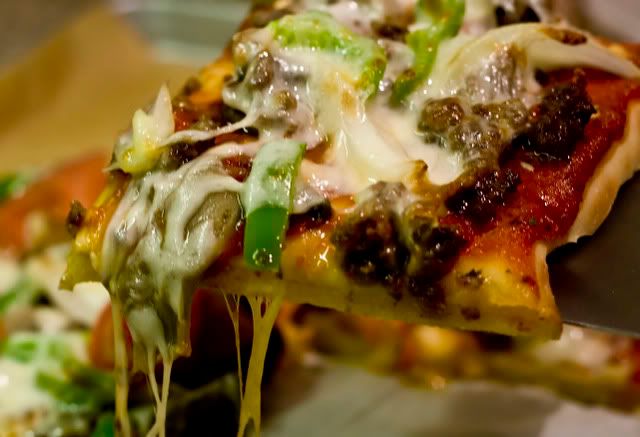
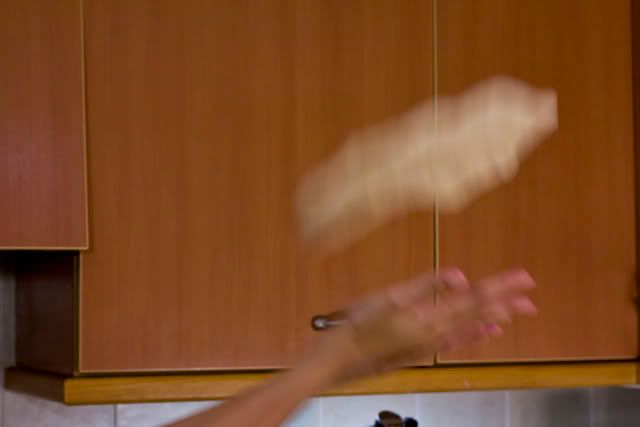
This month's Daring Bakers' challenge is Pizza and Toppings. The Pizza recipe is Peter Reinhart's Pizza Napoletana which I had made a few times in the past and then a combination of sauce and toppings on top.I was pleasantly surprised that this is this month's challenge. I love this pizza recipe, in fact this is the only pizza recipe that I bake. It is very easy to work with and the resulting pizza is just divine! It is perfectly crunchy and chewy, and it does not get soggy with the sauce and the toppings.Making the dough, I started with combining the dry ingredients together and then slowly adding the cold wet ingredients. Having the water cold is a key factor. I then mixed the dough until everything is combined and starts to form a ball. Afterwhich, I kneaded it with the dough hook attachment until it is smooth but still sticky. Then I kneaded it for 2 minutes with hand. Cold hands for kneading is also important. When my hand started to get warm, I run it with cold water. At this point, I divided the dough into 6 pieces, lightly spraying each with oil before wrapping with plastic and then I made it rest in the fridge overnight.The next day before using it, I took it out of the fridge 2 hours before baking to let it rise. Once the dough has risen, I attempted a toss but ended up rolling the dough. LOL! I rolled the dough in a sheet pan and baked it at almost 500F. After 5 minutes, I took it out and then I placed my sauce and toppings. For the sauce, I used a tomato sauce. I mixed a few teaspoons of lemon juice, spices like oregano, thyme and parsley, dash of garlic salt and pepper. For the toppings, I added some ground beef, green bell pepper, onions, mushrooms, grilled tomatoes and lots of mozzarella cheese. It was so delicious!Here's how the pizza looked like.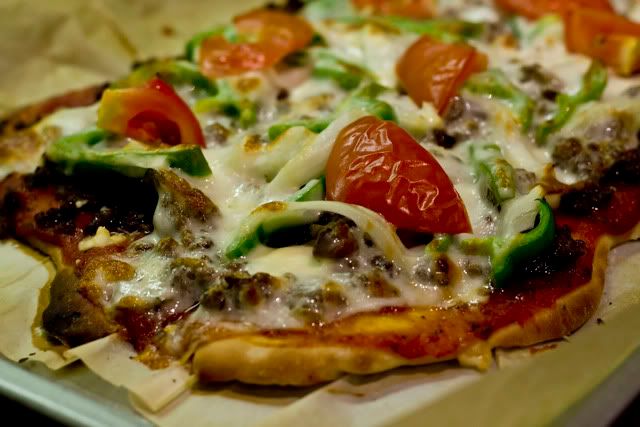 And here's a fuzzy picture of me attempting a toss!
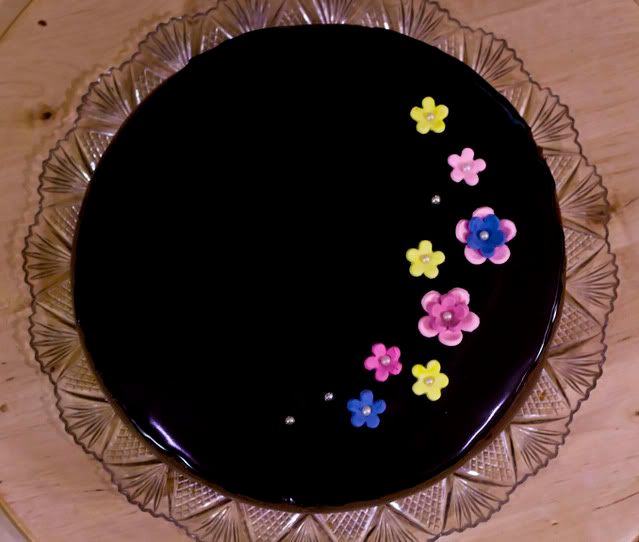
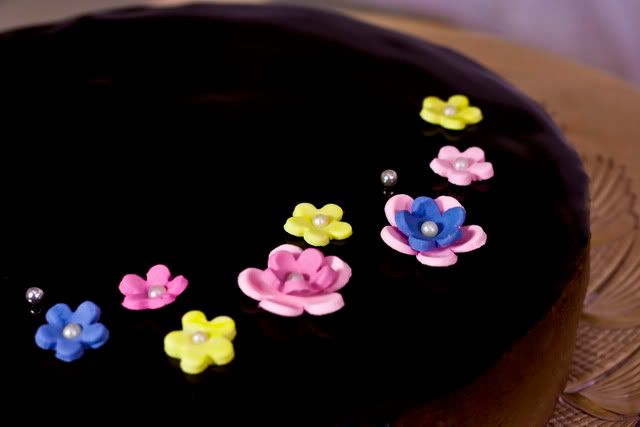
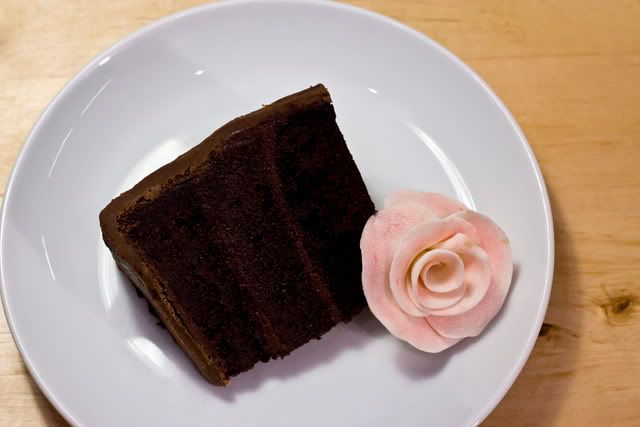
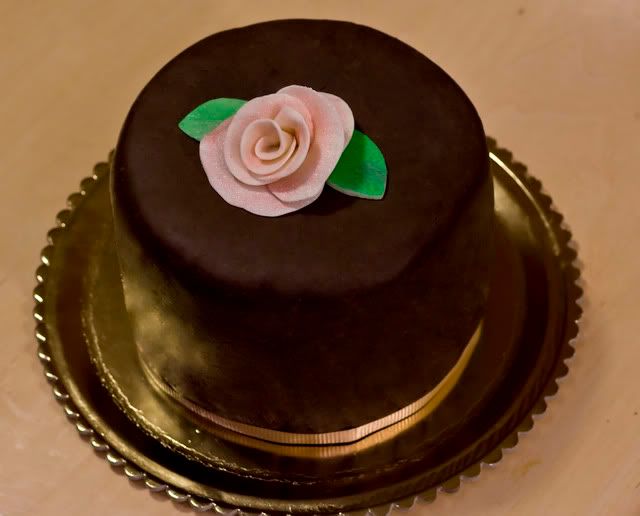 I have not baked anything with chocolates for the past month so I decided I will go over the top with chocolates. I baked the Ultimate Chocolate Butter Cake by Sarah Philips, filled it and frosted with Chocolate Ganache and then wrapped it with Chocolate Plastic. Everything will be chocolates.Somebody asked me what I love the most about making cakes, is it decorating? Actually, no. I love baking the most, the part where you mix flour, butter and all other stuff, then put it in the oven and then have a pretty layer of cake or nicely domed cupcakes. I always strive for perfection on the height and edges of the cakes. I don't mind having imperfect icing or decorations as long as I have a good cake. That is why I get frustrated when I cannot get a recipe perfectly, I keep baking the same recipe over and over until I get it perfectly. Having said that, I baked my cake pretty nicely and that's what mattered most to me. I love stacking layers and not having to torte or trim edges. The chocolate cake was so moist and very decadent, because it has melted chocolates and cocoa powder on it. It's like those expensive European cakes in cafes loaded with chocolates. I then made the ganache and it was so rich and fudgy! Once the cake layers were cooled, I assembled the cake with the ganache filling and frosting.It is my first time making chocolate plastic and it was easy. Putting it on the cake though is another story. I had a great time kneading the chocolate plastic, it was just like clay dough. I easily rolled it but I had a hard time putting it on the cake. I'm a total bummer with fondant and I think there is only one fondant cake that I had been happy about because I put the fondant nicely. The others had a lot of issues from folds, creases or cracks. As expected, I was not able to put on the chocolate plastic without issues. I had to do a lot of smoothening of creases after I put it. However, I think I produced a decent cake. I just topped the cake with a single rose and lined with a tiny lace at the bottom.So here's my chocolate overload cake. We will have it for dessert tonight, I bet it tastes good! I should know, I've tasted the components individually while making it. :)
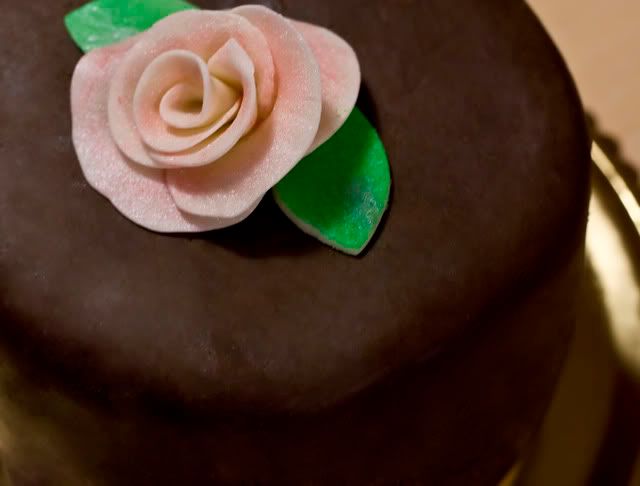
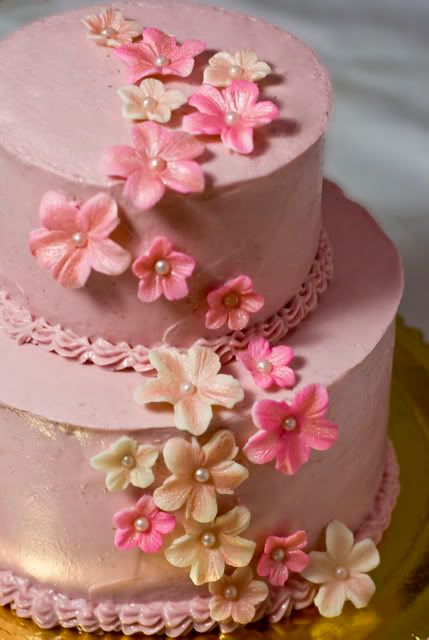 To celebrate my first baking anniversary, I made a mini-tiered cake. This is the first time that I made a tiered cake and since it's my first time, I tried with smaller pieces, a 4-inch cake on top of a 6-inch cake. I also wanted for days now to try the Raspberry Cloud Cake by Sarah Philips so it's like a match made in heaven. The Raspberry Cloud Cake is composed of a Genoise, Raspberry Buttercream and a Raspberry Syrup.A Genoise, a type of Sponge Cake, is a light and airy cake which is made with gentle folding of flour into the beaten eggs. This is my first time making a Genoise and it was not as easy as I thought it would be. I had to make it thrice, having failed on the first two attempts. I was tempted to give it a rest and try it some other time but I was so decided on making it a success. After carefully thinking of what went wrong, I figured why. My oven rack was in the middle instead of the lower third! When I thought I had a breakthrough, I decided to give it a try again, very carefully folding again and following Sarah's very detailed instruction and I succeeded. After 12 eggs down the drain, I finally have two 6 inch and two 4 inch layers of Genoise beaming at me. It was very late at night, but it was so worth it. :)
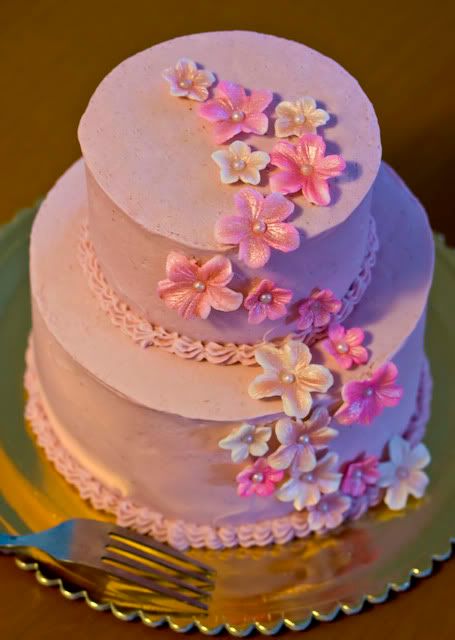 While the cakes were baking, I made the Raspberry Syrup and when the cakes were totally cooled, I just brushed the layers with some Syrup. Yum, I could imagine already how it taste like once made. I gave my layers a rest for the night. When I proceeded, I made the Buttercream and added some Raspberry preserves and the Raspberry liquer. Yum again! But anything with Raspberries is just yummy! The liquer gave it a huge flavor boost. And after adding the raspberry preserves and liquer, the buttercream turned into a pretty pink color. Maybe I should do blueberries next time and I'll have a nice blue tint in my cake. So I then frosted and smoothen the icing of the cakes and then stacked it up. I had to put a few dowels in the cake so that it would stand straight in the top layer and won't fall. I was so excited seeing the cakes one on top of the other! I then just decorated it with a few flowers that I made. I bought this edible lusters and it was fun brushing the flowers with it. It was like applying blush on. I was amazed at how pretty the flowers were after applying the lusters. I should probably get it in more colors. Hehe.
 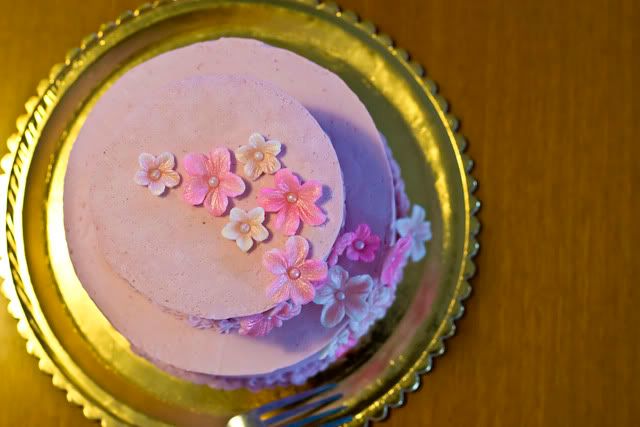 So here's the final cake, not perfect but not bad for a first time either. As they say, practice makes perfect. :) And greet me a happy baking anniversary~
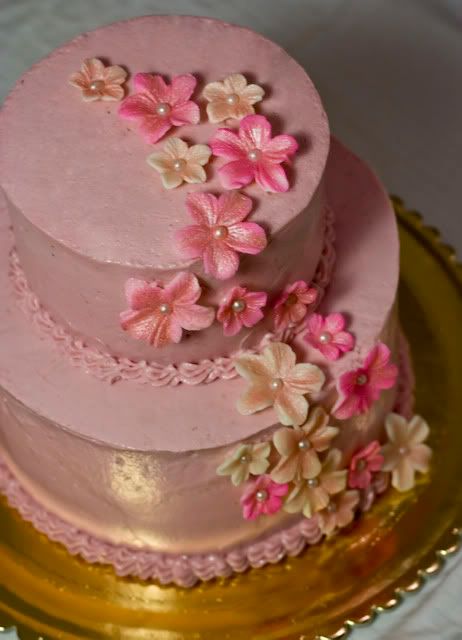
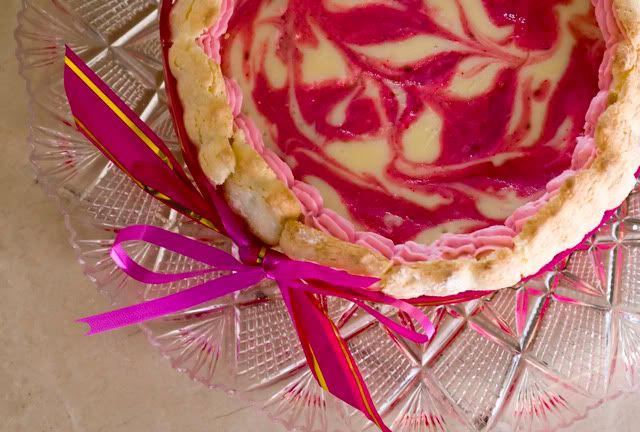 I'd been dying for weeks now to make swirls on my cheesecakes. I made several attempts and I failed over and over. On those attempts, I had cakes that started from a cake that had been an earthquake epicenter, to another which seemed to have Chinese writings (or Manny called it the "olympic cheesecake"). And I'm not exaggerating! This time around is a huge improvement from the previous hideous cakes that I made a few weeks back. Sarah told me to mix a little cheesecake batter on the strawberry jam because the jam is too heavy for the batter that it sinks, so I'm left with very thin pink lines at the top. I did as she told me and here it is, my swirly cheesecake. There's still a lot of improving to do with the swirls though, I did not get the deep pink/red color that I'd like it to be. I also think I incorporated air to the batter when I made the swirls so there were some popped bubbles on surface. For now however, I'm happy with the fact that I managed to do it!
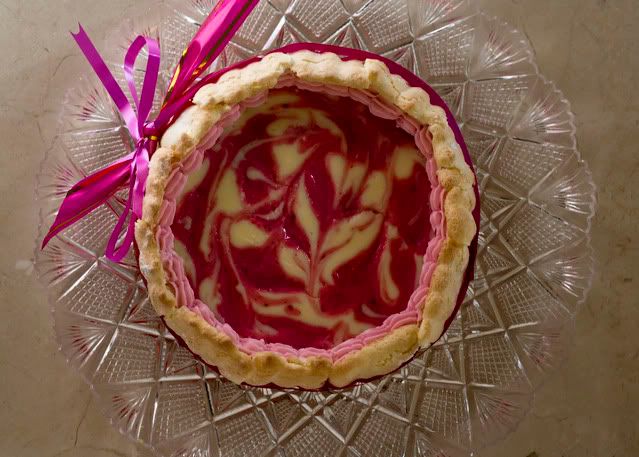 The bottom of this cake is the Cream Cheese Pound Cake which I baked and cooled, and then I topped it with the cheesecake batter. I baked it again in a waterbath and once it's done, I took it out, cooled it at room temperature for 2 hours before chilling it for 24 hours. To decorate the cake, I made some ladyfingers which I put on the sides. Then I piped some Raspberry Buttercream on the corner of the cake and the ladyfingers. Lastly, I tied the whole cake with a ribbon. It was so difficult finding a ribbon here in Haifa! I was so happy to find a store that sells one, but they won't sell me per yard. I had to buy the whole roll! Imagine buying a thick roll for an 8-inch ribbon? Oh well forget it, I ended up buying a pre-made ribbon at a giftshop that I had to break down to get a length that I can tie around the cake.I brought my cake to office the next day and everyone loved it. I myself am surprised at how delicious the combination of the Cream Cheese Pound Cake and the Strawberry Cheesecake tasted like.
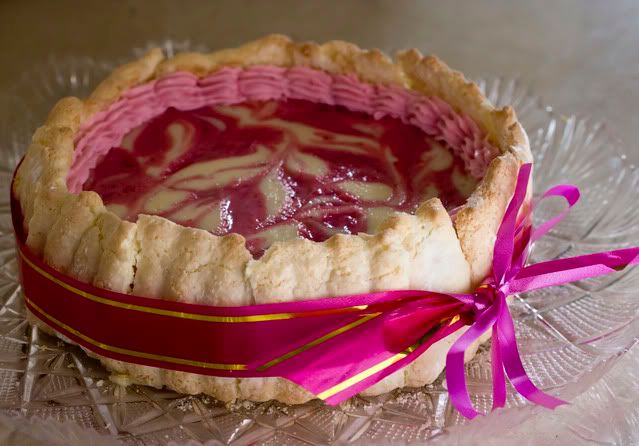
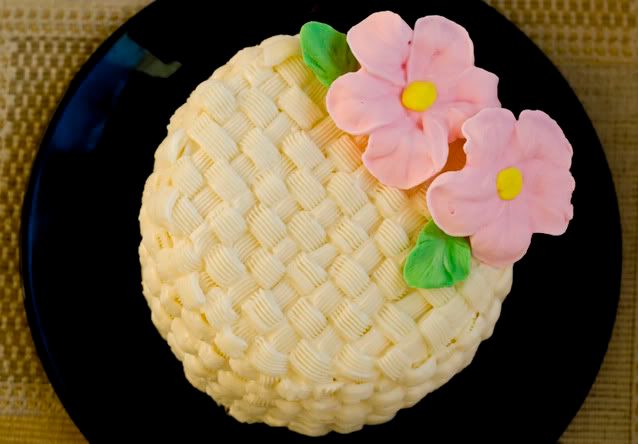
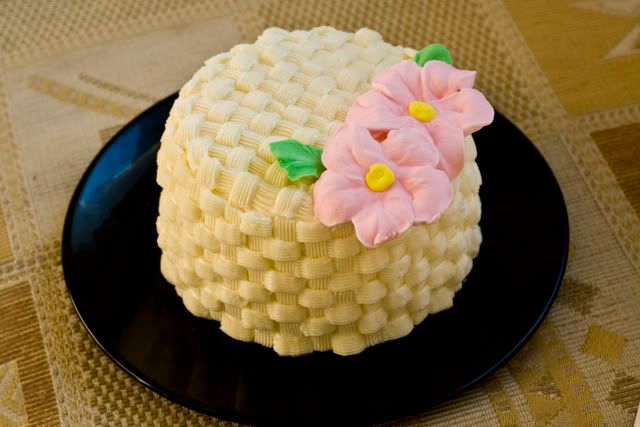
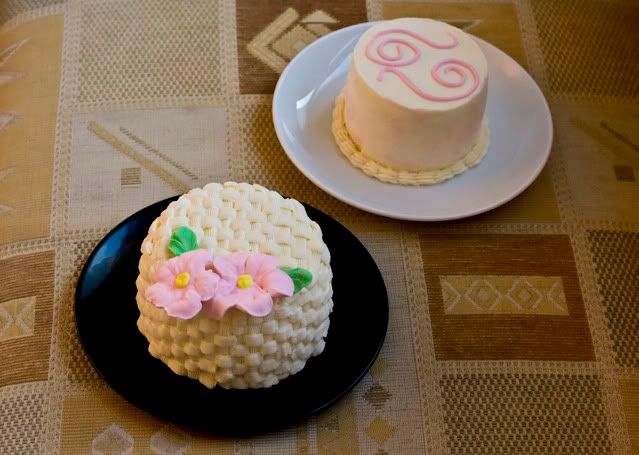
 I made a couple of mini cakes today because I wanted to try my 4-inch springform pans. I bought these little pans about a year ago (I think) and I had never made good use of them. I ended up making a Yellow and Pink Mini Cake.The Yellow Cake is the Golden Butter Cake from the Cake Bible. I made it because I was planning on making buttercream and then I will be having some leftover egg yolks. The Golden Butter Cake uses egg yolks only and uses heavy cream instead of whole milk. I mixed up the batter and ended up with a thick one that I transferred on the springform pans. I baked the cakes for 20 minutes and once out of the oven, I left the cakes in the pan to cool for additional 10 minutes then took it out of the pan to cool completely. The cakes baked very even and flat. I made 4 layers of the mini cake out of the recipe.The Pink Cake is the Cream Cheese Pound Cake by Sarah Philips. I baked the Cream Cheese Pound Cake for around 18 mins and I also cooled it in the pan for a few minutes. I took out one cake out of the pan to cool completely and the other I left on the pan. I had a leftover Cheesecake batter from a Cheesecake that I just made. What I did was pour the batter on the cake that is still in the pan, and baked it in a water bath for 20 minutes. After baking and cooling at room temperature, I refrigerated the cake to chill the cheesecake. I was able to make 2 layers of the mini cake, plus 1 layer of cheesecake.While the cake was cooling, I made my buttercream. Once I had my buttercream, I divided it into half. I flavored one half with Raspberry and colored it Pink, while the other half I flavored with Lemon and colored it Yellow. Lastly, I made a White Chocolate Frosting from Sarah Philips. I used Callebaut white chocolates. It was so good! I have learned never to scrimp on ingredients because it compromises the taste and whenever I need chocolates, I only use the finest, Ghirardelli or Callebaut.
  I started to assemble the cakes as soon all are cool enough and the frostings were done. For the Yellow Cake, I stacked 3 layers of the cake with White Chocolate Frosting in between layers. I also coated the entire cake with the frosting and I let the frosting crust. I did not need to crumb coat it because the frosting was thick. I left it for a while to cool in the fridge. As for the Pink Cake, I stacked the layers and sandwhich the cheesecake in between. Then I used the White Chocolate Frosting the coat the cake, and then I left it together with the Yellow Cake to cool in the fridge. After around 20 minutes when both cakes are chilled, I frosted each with the Lemon and Raspberry Buttercream, smoothened it and decorated.The Yellow cake slightly shrinked at the top, probably because of too much frosting. But it was still nicely upright. I piped a top and lower border for it and decorated it with some sugar flowers. I also left some buttercream to be colored green, but for some reason, I can't get a good green, therefore the dull color of the veins and the leaves. Hehe.As for the Pink Cake, I tried it with some messy vertical lines on the sides. Not sure if it worked, but the whole cake looked cute anyway. Hehe. I decorated the top with some basketweave patterns and some sugar flowers.
Here are more pictures of the cake, I know it is overloaded with color but it looked very pretty! We had the pink cake for dessert already and it is so yummy!
or